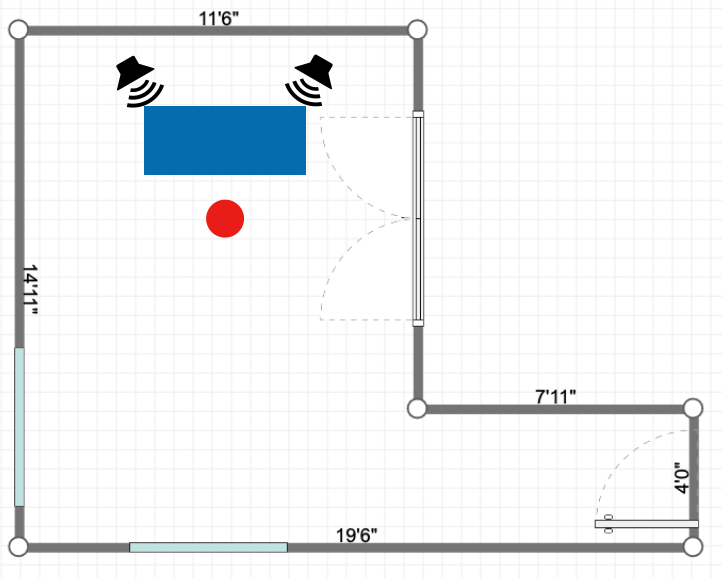
One of the first decisions to be made regarding home studio acoustics is where to position the mixing desk and reference monitors. Of course, there are many other decisions to make, such as the types and positioning of acoustic treatment, isolation solutions, and so on. But all of the subsequent choices will be based on the position of the desk. In this article, I’ll present some common room layout scenarios and suggest optimal mixing desk locations.
NOTE: This article is focused on a stereo set-up. Other configurations and acoustic treatment positioning will be discussed in future articles (stay tuned).
ELIMINATE THE WORST OPTIONS FOR HOME STUDIO ACOUSTICS
Corner positioning is rarely a good idea. This will cause an unnatural focusing of the sound reinforced by adjacent walls and rear reflections will not be balanced.

Positioning monitors too close to the wall without absorption will cause inaccurate bass response due to rear reflections from the reference monitors. Correct absorption panel locations will be discussed in future articles.
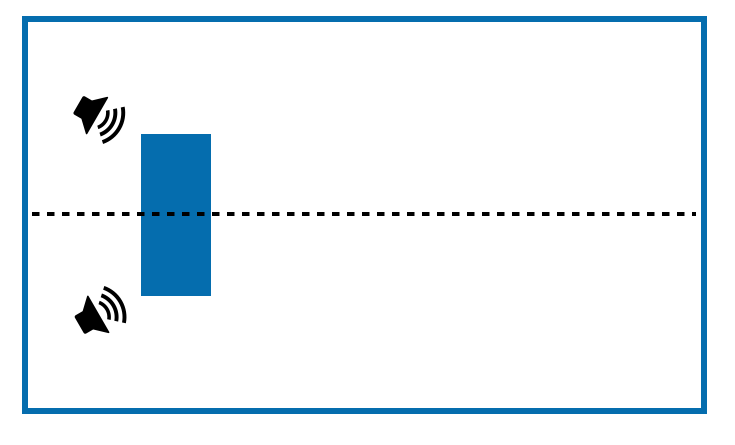
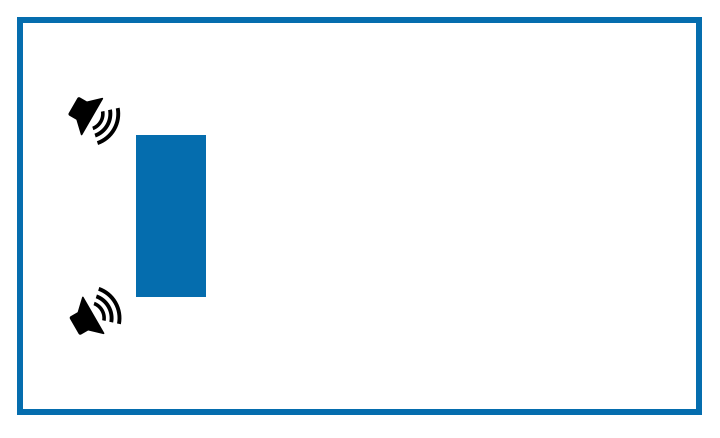
Symmetry is crucial at the listening position to ensure a balanced stereo field. While sitting at your desk, the sidewalls should look identical, and the front wall should ideally be a mirror image of itself if you were to draw a line down the center from the ceiling to the floor. Typical problems like closet doors, windows, or entrance doors will present challenges regarding symmetry.
Symmetry needs to be considered when positioning acoustic treatment like absorbers, diffusors, bass traps, ceiling panels, and area rugs as well, so things like doors and windows might present challenges to ideal positioning.
SQUARE AND RECTANGULAR ROOMS
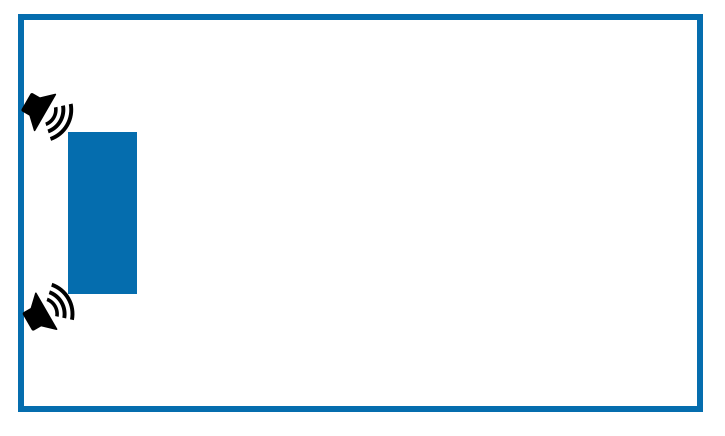
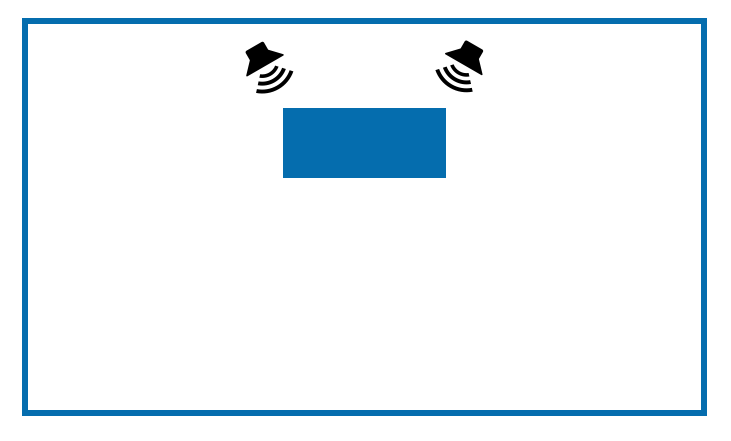
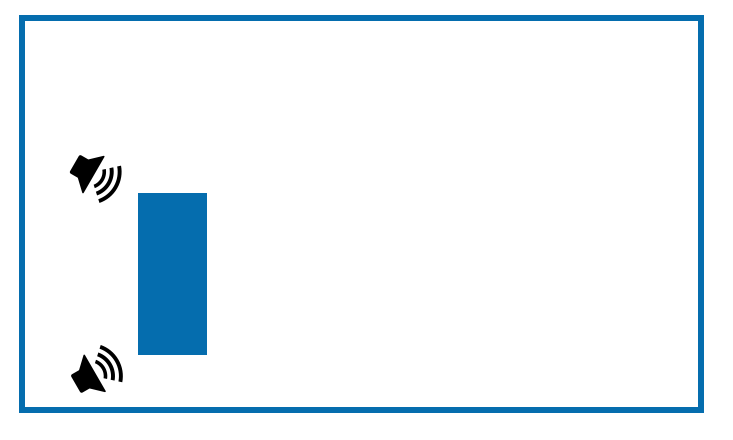
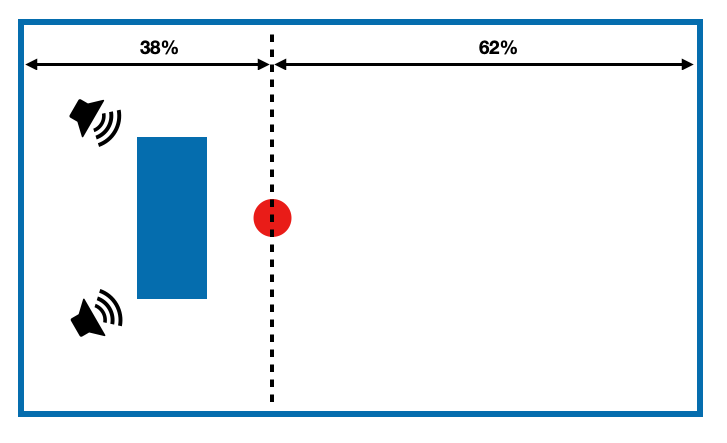
Most rooms in a typical house or apartment are either square or rectangular, and neither shape is conducive to studio acoustics. Square rooms are the most problematic, since regardless of which wall you center your desk on, the rear wall will likely cause reflections that interfere with the direct sound from your monitors unless the room is huge. In a rectangular room, you should center the desk on one of the short walls to maximize the distance behind the listening position.
Poor Positioning – centered on the wrong wall (above)
Poor Positioning – asymmetrical location (above)
Optimal Positioning (above)
THE 38% “RULE” (OR STARTING POINT)
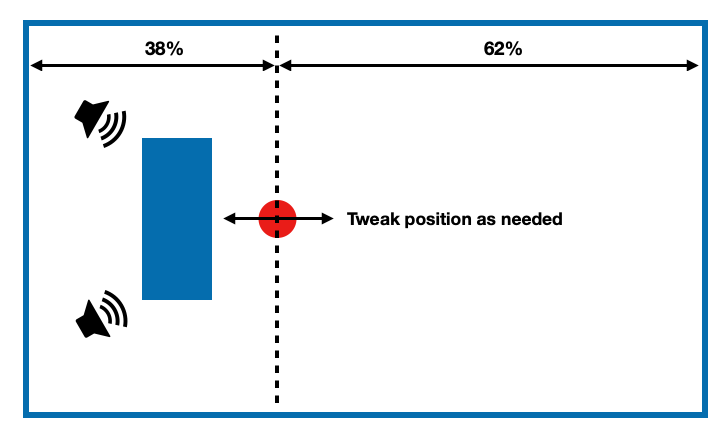
There is a concept called the “38% rule” which can provide a good starting point when determining the location of the optimal listening position. You take 38% of the length of the room and that becomes the distance that the listening position is from the front wall. For example, if the room is 12 x 10 feet you would center the desk on one of the 10-foot walls and the listening position would be 4.56 feet from the front wall (12 x 38% = 4.56). The so-called rule originated from Wes Lachot, which he briefly describes in the Pro Sound Web forum.
The concept relies on several assumptions such as rectangular room shape, balanced reflectivity, and perfect symmetry at the listening position. In reality, perfect conditions are never the case, so you might consider the idea as more of a suggestion or starting point.
While there are all sorts of room mode calculators and raytracing applications out there that might help pinpoint a more precise sweet spot, none of these can accommodate all the nuances in your particular space. That would entail a detailed analysis of all the surfaces and objects in the room, including determining the average absorption coefficient, effective frequency range of diffusion devices, reverb time (RT60), etc. This sort of expertise and precision is well beyond the average home producer.
A good approach is to start at 38% and tweak the position (moving forward towards the front or backward away from it) until you perceive a well-balanced frequency response from a reference track, primarily in the low end. This can be done after your desk and monitors are in place at least temporarily. You might even use a good pair of headphones to A/B the difference between room effects and headphone audio in various locations.
REFERENCE MONITOR POSITIONING
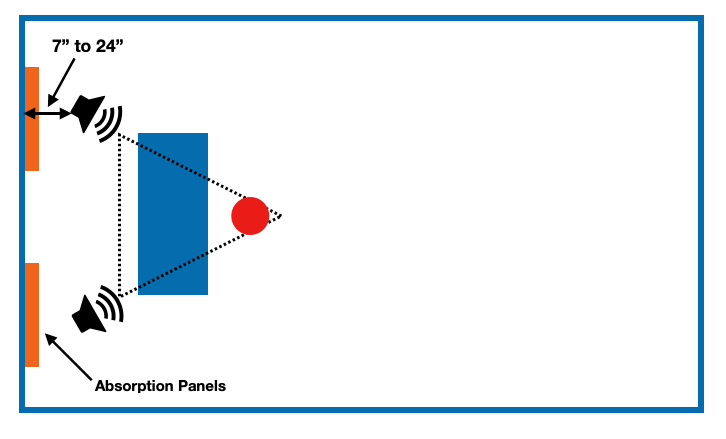
Some acousticians suggest monitors should be set out from the wall 7” to as much as 40” for larger rooms (source) unless it is possible to flush-mount the speakers, which is usually not the case in home studio situations. In most cases, setting the speakers out 7” to 24” or so with an absorption panel behind them will work just fine.
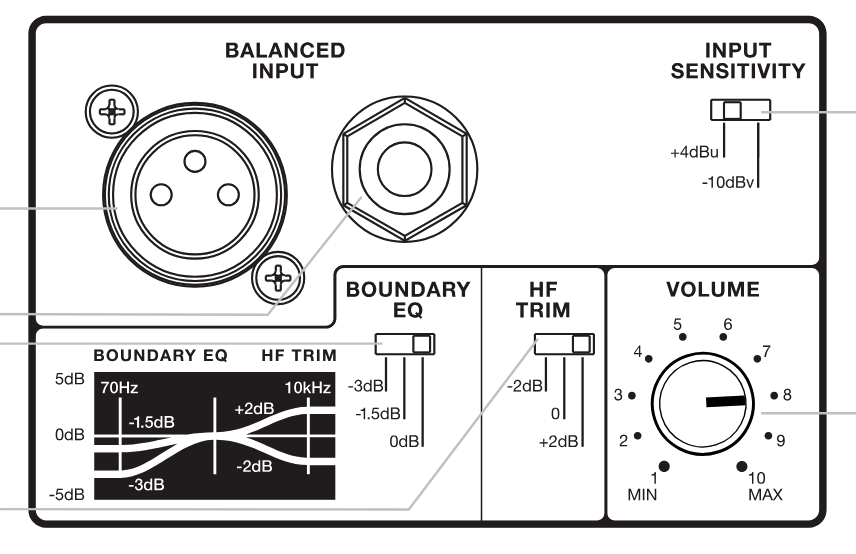
In pro studios, flush-mounted speakers are often used because they extend the critical distance and the listening position can be further away to accommodate large mixing consoles. Of course, there are limitations in smaller spaces that would not allow larger distances from the front wall, especially when considering the 38% rule mentioned above. So a good approach might be to approximate the listening position first. Also, be aware of settings on your monitors that will accommodate various positioning and room characteristics. Consult the manual for your particular speakers.
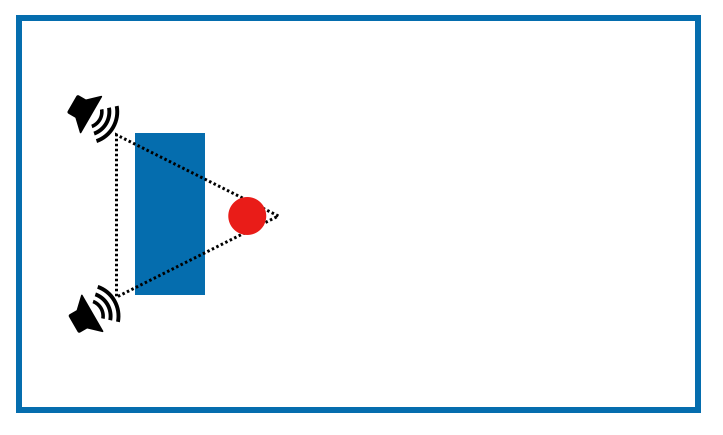
The distance between speakers should be approximately 3 to 4 feet. The distance from either speaker to the listener should be equal to the distance between speakers so that an equilateral triangle is formed. Note in the image below that the actual apex of the triangle is behind the listener’s head since the reference monitors should focused directly at the ears, not the nose. This is because a lot of music stinks. (apologies for the gratuitous wisecrack for those still reading – LOL)
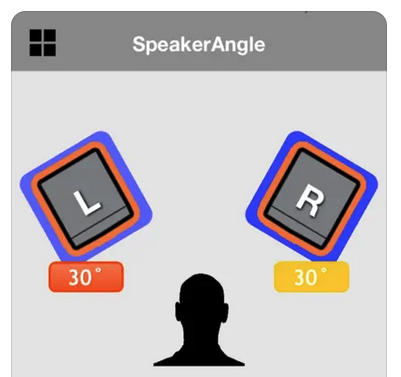
The angle of the speakers should form a triangle with 60º internal angles or 30º toe-in angles depending on how you measure it. You can also use apps like SpeakerAngle to adjust the angle.
OTHER FURNITURE AND OBJECTS IN THE SPACE
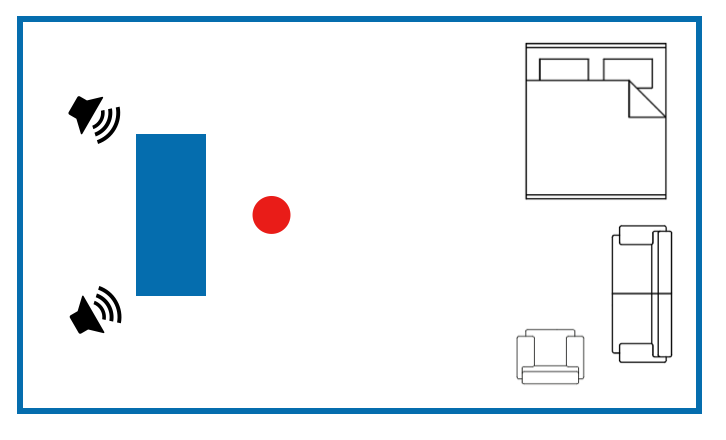
The phrase bedroom producer is an extremely common term for a reason. Many people don’t have the luxury of a dedicated space for music production and there will be other objects in the space like a bed, bookshelf, chairs, etc. It is important to do your best to keep these objects away from the front wall and listening position if possible as every object will affect the acoustics.
ODD ROOM SHAPES
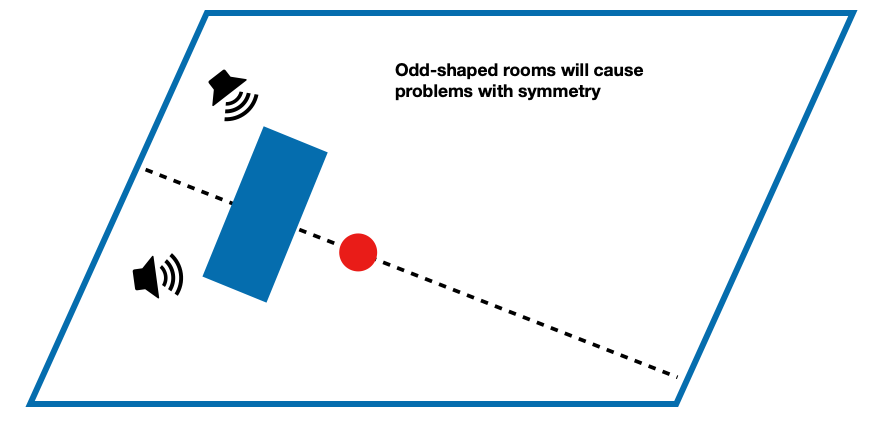
Often a room might have a hallway or alcove leading into the main space. You should avoid positioning a desk near these areas due to the problems of symmetry mentioned earlier. If this proves unavoidable, you’ll have to consider ways to temporarily close-off or block the openings to preserve symmetry via acoustic curtains or moveable gobos. Asymmetrical angled walls also present a challenge. We’ll visit some solutions in future articles.
EXAMPLES
Below are some typical room shapes with various challenges regarding windows, doors, closets, and hallways. Have a look at the solutions for desk/monitor positioning and listening position. Rooms come in all shapes and sizes but perhaps one of these layouts is similar to what you have.
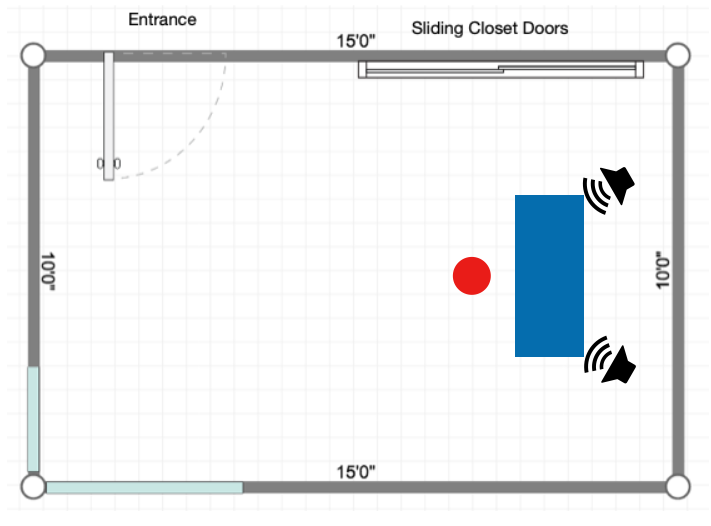
Room 1 – To keep the desk centered on one of the short walls the solution below is the best option. The closet doors will have to be dealt with to maintain symmetry, but the opposite wall would be even more problematic.
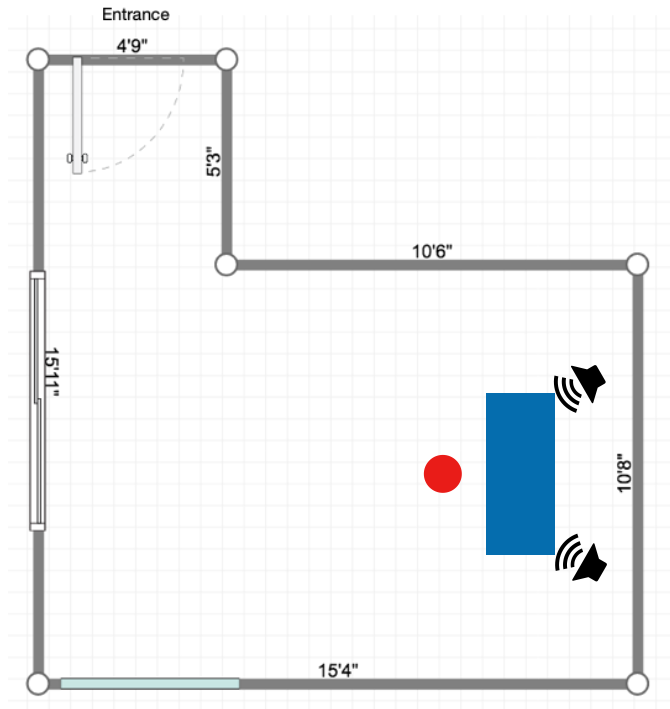
Room 2 – Challenges here are in the rear of the listening space. The closet doors and window will create some issues with symmetry, but the desk positioning shown is still optimal.
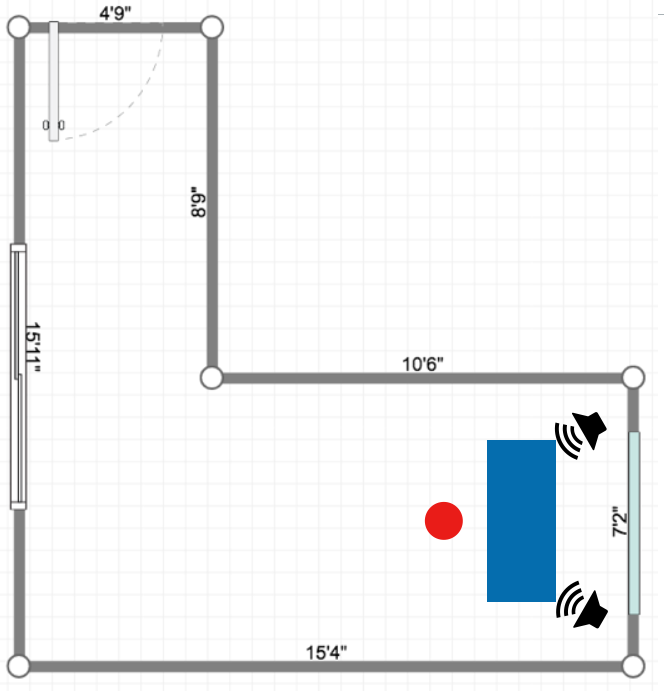
Room 3 – The long hallway in this layout should be closed off with some temporary solution like a moveable panel. The window on the front wall could be covered with an acoustic curtain or absorption panel.
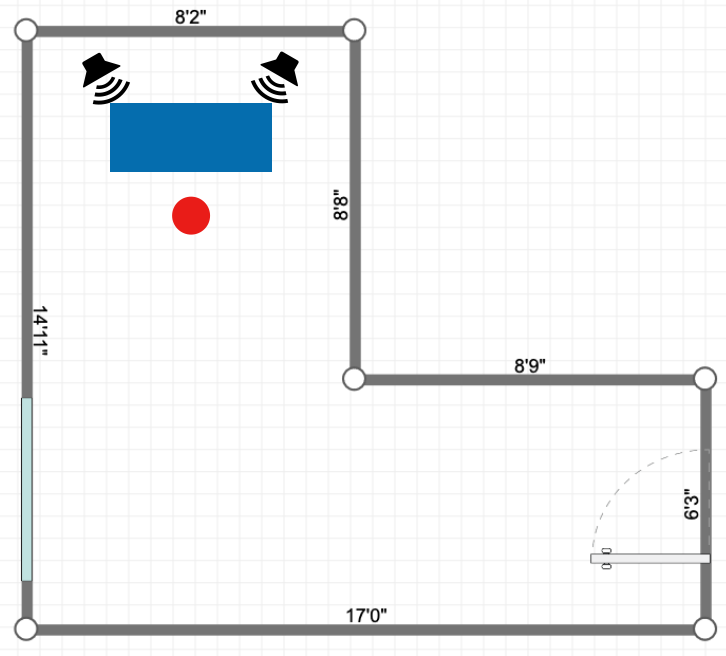
Room 4 – The L-shaped room is again a challenge and the window presents an asymmetrical situation. But the desk positioning is the best you get in this situation.
Room 5 – Here we have closet doors and windows to deal with as well as the L-shape. Again the desk positioning shown is the best option.
CONCLUSIONS
Acoustics is a game of inches, so never hesitate to pull out the old measuring tape when positioning your desk, monitors, acoustic treatment, etc. Symmetry, listening calculation, and front wall choice are crucial decisions to make at the start of the process. Once this is done, other solutions regarding acoustic treatment and position will fall into place. More to come in future articles. Good luck!
RESOURCES
Room Mode Calculator
Raytracing App
Room Layout Tool
Room Visualizer
Plan Your Room Tool
REFERENCE BOOKS
Everest, F. Alton, and Ken C. Pohlmann. Master Handbook of Acoustics. McGraw-Hill Education, 2022.
Gallagher, Mitch. Acoustic Design for the Home Studio. Thomson Course Technology Professional Technical Reference, 2007.
Howard, David M., and Jamie Angus. Acoustics and Psychoacoustics. Routledge, 2017.
EXTRAS
Want to win a free license to Kontakt 8? Be one of the first 1000 people to FOLLOW WAVEINFORMER ON INSTAGRAM to be automatically entered to win one of three full-version Kontakt 7 licenses! Read more.
Assess your knowledge of essential audio concepts using our growing catalog of online Quizzes.
Explore more content available to Subscribers, Academic, and Pro Members on the Member Resources page.
Not a Member yet? Check the Member Benefits page for details. There are FREE, paid, and educational options.


 (
(