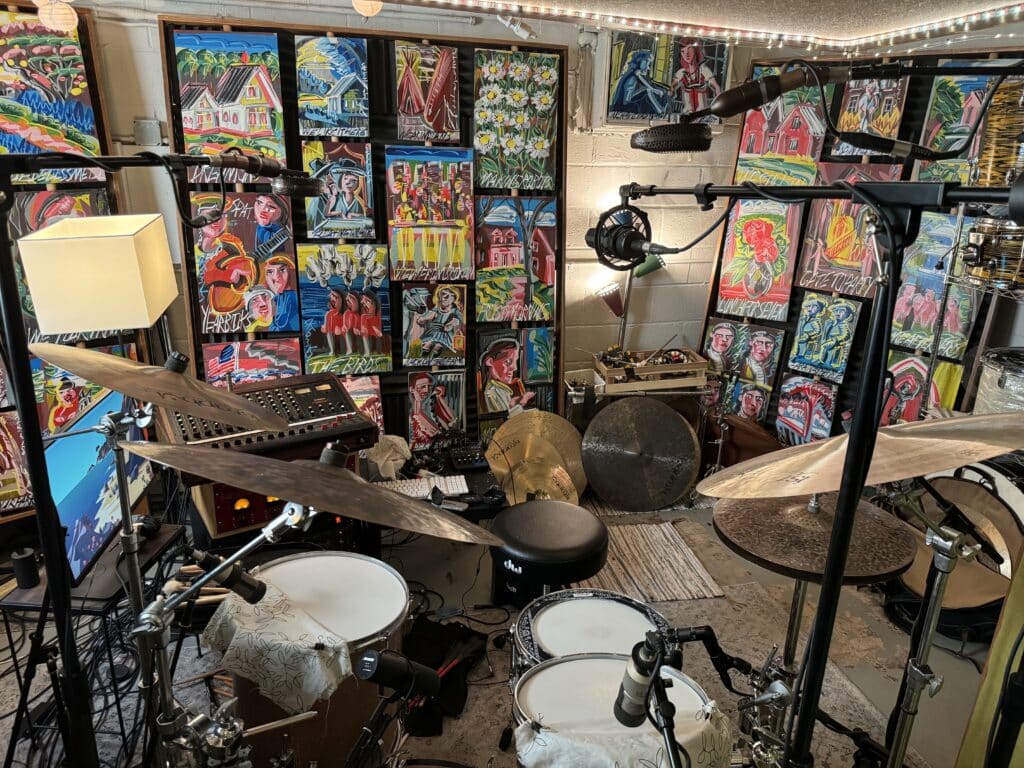
Achieving the right kind of drum sound is crucial for the success of a production. Some songs benefit from the energy and explosiveness of a roomy drum sound, but this isn’t always the case. Recently, I have produced several songs, titled Weird Old Man and Light Up The Room, that required a dry drum sound. I was looking to achieve a thick, powerful drum tone that referenced the qualities of drum recordings in the 1970s. Beneath, friend and fantastic session drummer/engineer John O’ Reilly of Boom Crash Drum Tracks breaks down how he achieved a dry drum sound on these recent productions.
What is a “Dry” Drum Sound?
A “dry” drum sound refers to a drum recording that has minimal reverb, room ambiance, or any other effect that would add a sense of space or echo to the sound. This type of sound is typically tight, focused, and more direct, capturing the raw and punchy character of the drums without the influence of heavy room reflections or artificial effects. Dry drum sounds often have a more intimate and upfront quality, making the individual drums stand out more clearly in the mix.
Key characteristics of a dry drum sound:
- Minimal reverb: No long, lingering echoes or room reflections.
- Tightness: The drums are usually mic’ed up closely and without excessive room microphones, leading to a more controlled and crisp sound.
- Focus: The individual drum hits—kick, snare, toms—are distinct and clear, often with more punch and impact.
Before we go in depth and listen to the individual mics/drums, have a listen to an excerpt of all of the drums together, with no processing, and minimal balancing.
Audio PlayerYou can also listen to the mixed and mastered version of the song “Weird Old Man” in it’s entirety:
Kick Drum Microphone Selection and Placement
Kick In Mic:
When selecting a microphone for the inside of the kick drum, I prioritize capturing both deep low-frequency punch and high-mid frequency detail for clarity and attack. Over the years, I’ve experimented with several industry-standard options, including the AKG D112, Shure Beta 52, Sennheiser 421, Electro-Voice RE20, and the popular Audix D6. Despite using these mics extensively, I never found complete satisfaction with any of them.
For a time, I used a Heil PR40, which is quite similar to the RE20. While it excels in the midrange, it lacks the low-end fullness I was seeking. That is, until I discovered the Dr. Alien Smith Alien8. This microphone features two stacked figure-8 capsules, with a switch to select one or both capsules. I generally use both, as it captures a perfect balance of high-frequency detail and low-frequency punch. Its unique design allows for the tone of both drum heads to be heard clearly, offering a rich and full sound that I’ve found unmatched. It’s an incredibly versatile and affordable choice, though availability can be limited depending on Dr. Alien Smith’s inventory.
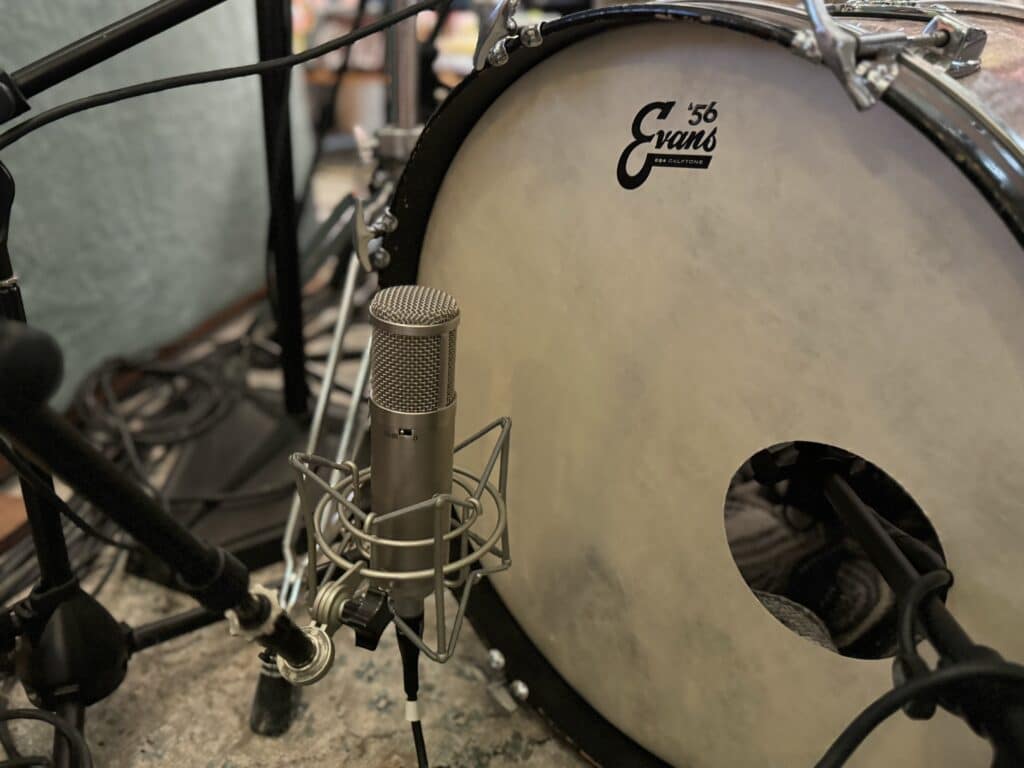
Kick Out Mic:
For the outside mic, my goal is to capture a round, complementary tone from the resonant head that enhances the sound of the inside mic. This mic helps to round out the overall kick sound, adding subtle decay and a softer low end to balance the punch from the internal mic.
For this task, I use an Advanced Audio CM48fet, which is a variation of the CM47fet, a copy of the iconic Neumann U47fet. The CM48fet offers selectable polar patterns, including cardioid, omni, and figure-8. Through experimentation, I found that the figure-8 setting works best for capturing the resonant head’s full tone, adding depth and dimension to the sound.
One thing to note is that the CM48fet can easily overload if placed too close to the drumhead. To avoid this, I typically position it about six inches away from the head, allowing for a clear and balanced sound without distortion.
Audio Player
The Kick Out Mic
Snare Drum Microphone Selection and Placement
Snare Top Mic:
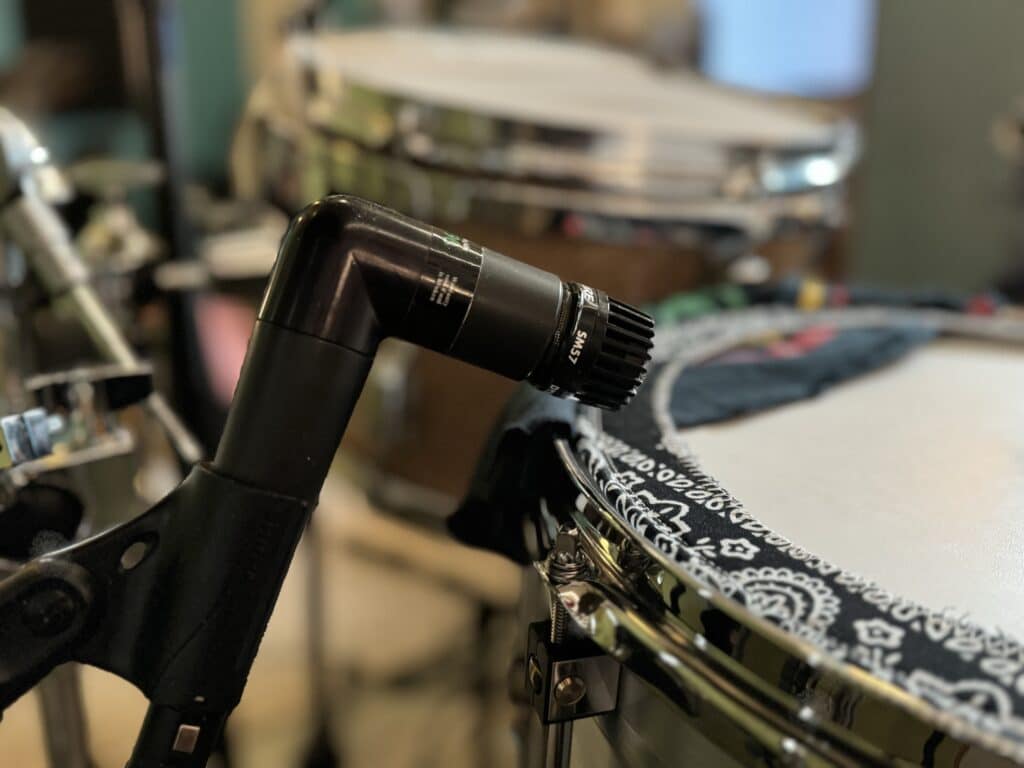
For the top snare microphone, I’ve found the Shure SM57 to be the best option, consistently delivering a balanced sound that captures both midrange detail and low-end thump. While I’ve experimented with various alternatives over the years, I always return to the SM57. Its versatility is largely due to the proximity effect, which allows me to adjust the amount of low-end response by positioning the mic closer or further from the drumhead.
I typically position the mic fairly close to the drum, about 1 inch above the rim with the diaphragm pointing at the center of the head. This placement ensures a sharp, punchy sound with a bit of “sizzle” on top. If the snare is particularly ringy or being hit hard, I may pull the mic back slightly to capture a fuller tone, but in most cases, I prefer to focus on the direct attack and high-end crispness.
The Top Snare mic
Snare Bottom Mic:
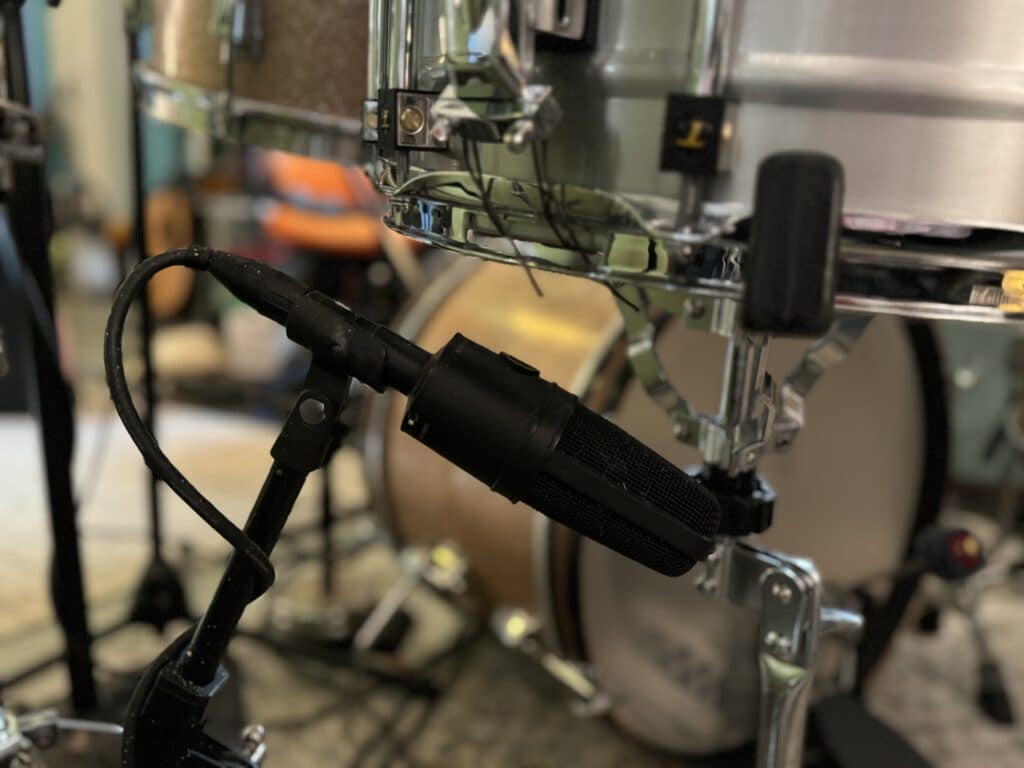
The bottom snare mic serves a more specialized purpose: capturing the shimmer of the snares. It’s not as essential to focus on the lows here, and I typically EQ those out to avoid unwanted bleed, particularly from the kick drum. The key is using a directional mic to ensure the snare’s bright and resonant qualities come through without too much bleed from other drums.
For this, I use an Audio-Technica AT4033, a bright large-diaphragm condenser microphone. The AT4033 offers a natural, detailed sound that excels at picking up the snare’s high-frequency shimmer without sounding overly harsh. Though the mic’s brightness can accentuate the snare wires’ sparkle, I find it provides a more organic and open sound compared to dynamic options like the SM57.
While some people might overlook the importance of a bottom snare mic, I find it indispensable. It doesn’t require much volume in the final mix, but it adds a layer of realism and texture that is essential for achieving a natural snare sound.
The Snare Bottom Mic
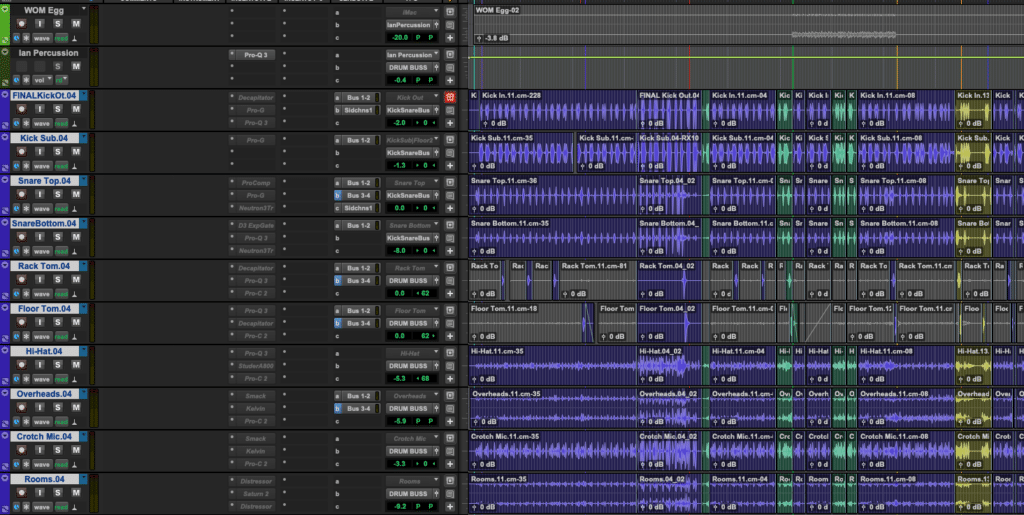
The Comped and Edited Drums within the Pro Tools Session for “Weird Old Man”
Tom Drum Microphone Selection and Placement
Tom Mics:
For toms, I aim for a sound that is punchy and full of low-end energy. However, achieving the right balance with toms can be a bit more challenging than with other drums. While close-miking provides a solid attack and emphasizes low-end thump, it doesn’t always capture the full tonal body of the tom. In my experience, the true “body” of a tom is often better captured by overhead mics, as they provide a more natural sense of the drum’s resonance and depth.
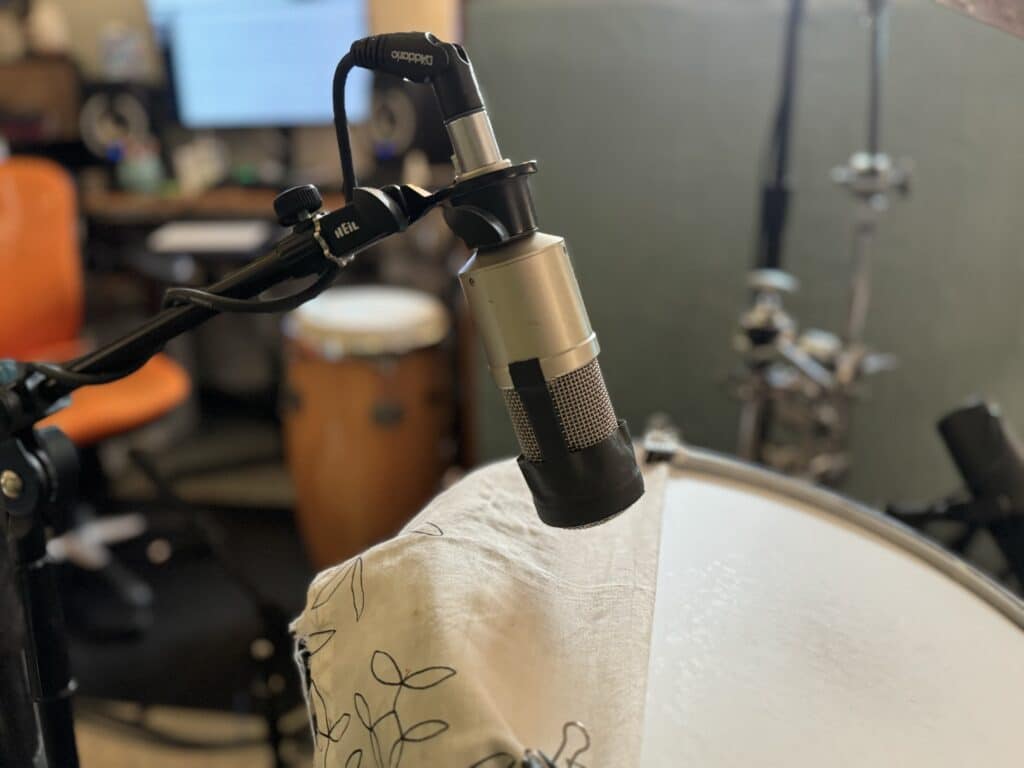
When positioning the tom mic, I prefer to place it fairly close to the drumhead in order to take advantage of the proximity effect, which enhances the low-end response. However, I avoid placing it so close that the sound becomes muddy. Additionally, because toms can be prone to cymbal bleed, I angle the mic downwards as much as possible while still aiming it at the center of the drumhead to capture the initial attack. This helps minimize unwanted cymbal noise and keeps the focus on the tom’s punch.
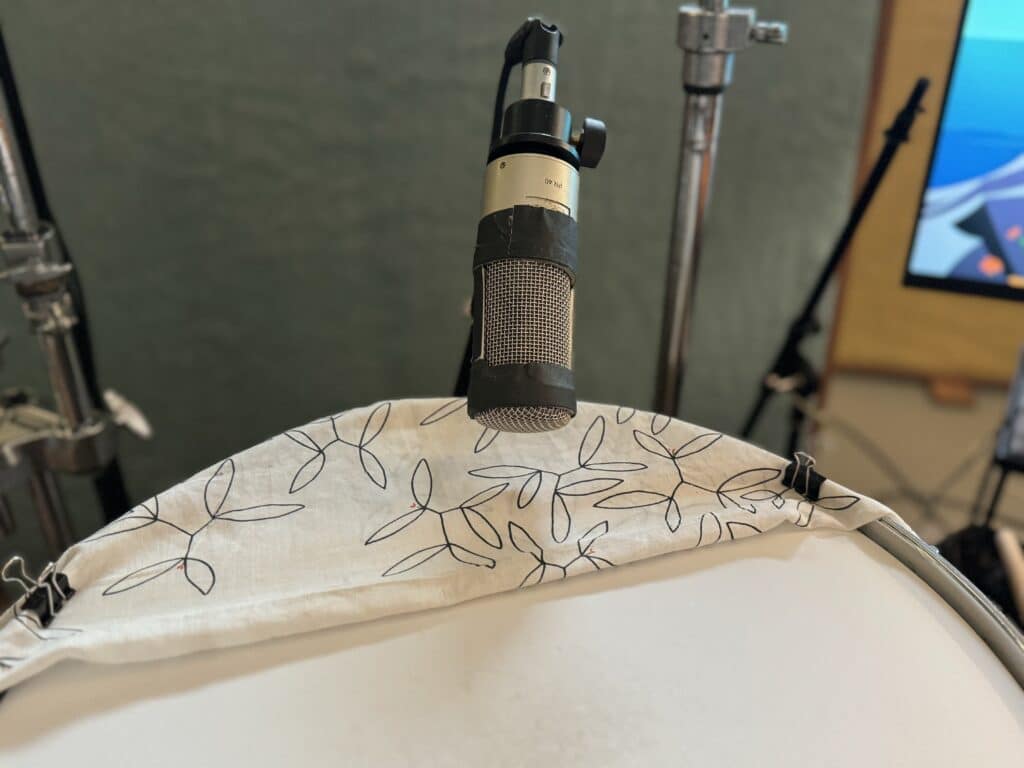
I tend to tune my toms quite low, which can lead to significant rumble, especially when using close-mic techniques. To control this, I almost always use some form of muffling. My preferred method involves using thin cloth, secured with small binder clips. While there are countless muffling options available, I find this approach allows for precise control over the amount of dampening, the tightness of the cloth, and how much of the head is covered. I experiment with single or double layers of cloth to find the right balance, ensuring that the tom sounds controlled but still resonant.
If the toms are tuned higher, I may forgo muffling, but I always remain mindful of sympathetic vibrations, especially from the snare drum. While gating can help reduce this interference, a bit of muffling often prevents this issue from becoming problematic, keeping the sound clean without losing too much of the tom’s natural resonance.
Mic Choice:
For toms, I use Heil PR40s, which are similar to the Electro-Voice RE20. The PR40 is a robust dynamic microphone known for its smooth frequency response, especially in the low-mid range. It’s not too bright in the high frequencies, which helps maintain a natural tone for the toms without adding unnecessary harshness. Additionally, the PR40 is a durable mic that can withstand the physical demands of close-miking toms, as evidenced by the several marks and signs of wear on mine—something I’ve had to reinforce with gaffer tape over time.
The Rack Tom
Audio PlayerThe Floor Tom
Overhead Microphone Selection and Placement
Overhead Mics:
When it comes to overheads, there are two primary approaches: capturing the full kit for a natural representation of the drum set or focusing primarily on cymbals. My preference is to strike a balance between the two, placing emphasis on the cymbals while still capturing some of the overall kit sound, particularly the toms. While I’m not overly concerned with how the kick and snare sound in the overheads, I do appreciate the tonal qualities of the toms when captured from above, so I take care in positioning the mics to achieve that.
There’s a great deal of debate around the ideal overhead mic placement, with many different schools of thought. Some prefer an XY configuration above the snare, others opt for a spaced pair equidistant from the snare, while some place the mics above the ride and hi-hat bells. For me, I prefer placing the overheads above the toms, especially since I typically use two toms, which makes this an easy choice.
To achieve a well-balanced stereo image and avoid phase issues, I aim to position the overheads equidistant from the snare. But because the tom placements are not symmetrical to the snare, the left overhead (from the drummer’s perspective) is placed slightly higher than the right to ensure both mics are equidistant from the snare, compensating for the fact that the high tom is closer to the snare. This also positions the mics at a similar distance from each tom, given that the high tom is higher than the floor tom.
Mic Choice:
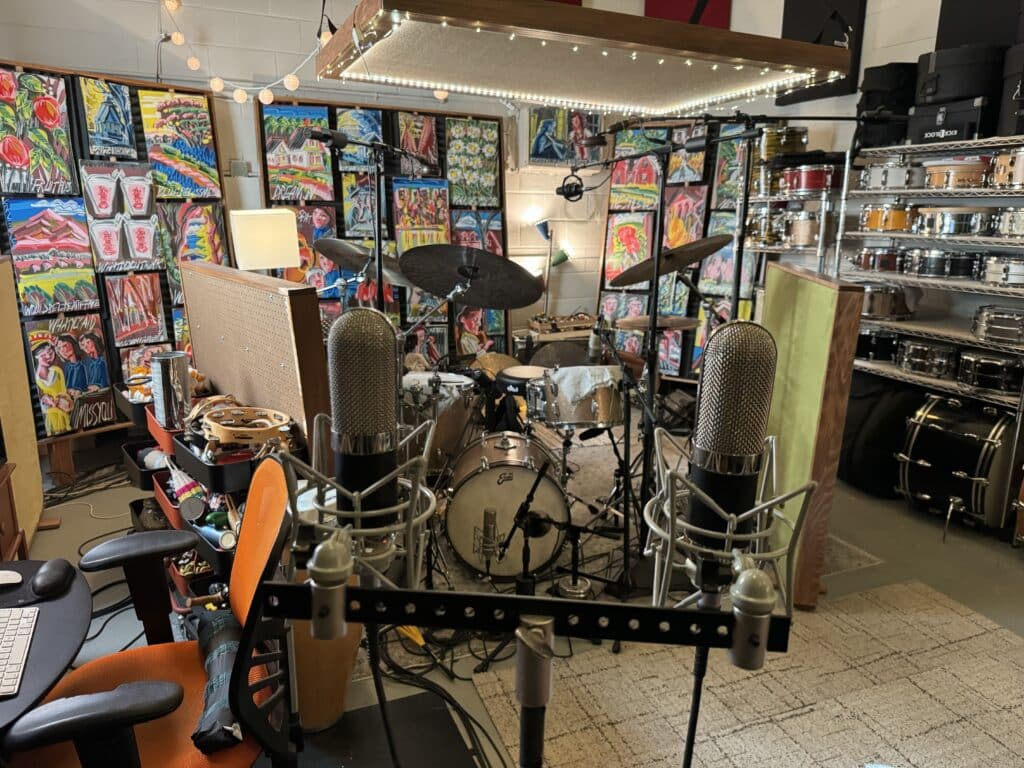
My go-to microphones for overheads are the Coles 4038 ribbon mics. I love the warm, natural sound they provide, particularly when capturing cymbals. Since these mics feature a figure-8 pattern, they tend to pick up more room sound than a typical cardioid mic. This can be a desirable characteristic for some projects, but if I want to minimize room reflections, I’ll adjust the absorption cloud above the drums to reduce what the Coles pick up from behind. This cloud is adjustable, allowing me to fine-tune how much of the room sound the mics are exposed to.
For a more focused, modern sound, I sometimes switch to Audio-Technica AT4050s, which are cardioid condenser mics. These provide a more directional and controlled sound, which can be ideal when I need a tighter overhead picture without too much room interference.
Audio PlayerMono Overhead:
Recently, I’ve started using a mono overhead in addition to the stereo pair. Since the Coles 4038s are ribbon mics with a figure-8 pattern, they capture a considerable amount of room sound. To counterbalance this, I use an AT4050 set to cardioid directly above the snare. I position it as low as possible without risking it being hit by sticks—usually about 10 inches lower than the stereo overheads. This gives me a more direct and focused option for the overhead sound.
It’s important to note that adding a mono overhead can introduce phase issues with the stereo pair, so I carefully adjust its position—mostly in the vertical axis—until I achieve a balance where the sound is relatively in phase with the stereo overheads.
Hi-Hat Mic:
Though I don’t often use it in the final mix, I always record a close hi-hat mic for flexibility. For this, I use a Shure SM81, a small diaphragm condenser. The mic choice here is somewhat flexible, but it’s important not to place the mic too close to the cymbal, as it can sound unnatural. I position the SM81 about 5 inches above the hi-hat, aimed straight down between the bell and the edge of the cymbal, ensuring a clean capture without excessive proximity effect.
Audio PlayerRoom Microphone Selection and Placement
Room Mics:
Room microphones play a crucial role in adding space, dimension, and ambience to the drum sound. The quality of the room itself directly impacts the effectiveness of the room mics. If the room has a great sound, the mics will capture that well; however, even if the room sound is somewhat imperfect, positioning the mics strategically to capture the distant reflections and room tone can still bring life to the drum kit.
I’ve experimented with numerous placements over the years, including XY, Blumlein, and spaced pair configurations. One of my favorite setups is using a spaced pair of mics angled towards the ground to capture reflections off the floor, which adds an interesting dimension to the sound.
Currently, my preferred setup involves two ribbon mics placed about a foot apart, pointed directly at the drum kit, and positioned about four feet off the ground. The mics are placed roughly 7 feet from the front of the kit. This placement works well in my room, which has an irregular shape that contributes to its unique sound. I’ve found that when I place the room mics too far apart, they capture noticeably different tonal qualities, making stereo imaging difficult. To address this, I keep the mics close together and find that having both mics pointed directly at the kit provides the most balanced sound.
The microphones I use for this setup are Cascade Vin-Jets, which I’ve had modified with the optional Lundahl transformers. These ribbon mics feature a figure-8 pattern, similar to the Coles 4038s in tone, but at a fraction of the price. I recently learned that Cascade’s new company name is Pinnacle Microphones, and the updated version of the Vin-Jet is now called the Vinnie. Regardless of the name, these mics deliver a rich, natural sound that works perfectly for capturing room ambience without being too overbearing.
Distant Room Mics:
Because I have the benefit of a relatively large room, I often use two sets of room mics: one set placed relatively close, around 7 feet from the kit, and another set placed farther back, approximately 20 feet from the kit and about 8 feet high. The distant mics are primarily intended to capture the overall ambience of the room, with a focus on the natural reverberation and space around the drums.
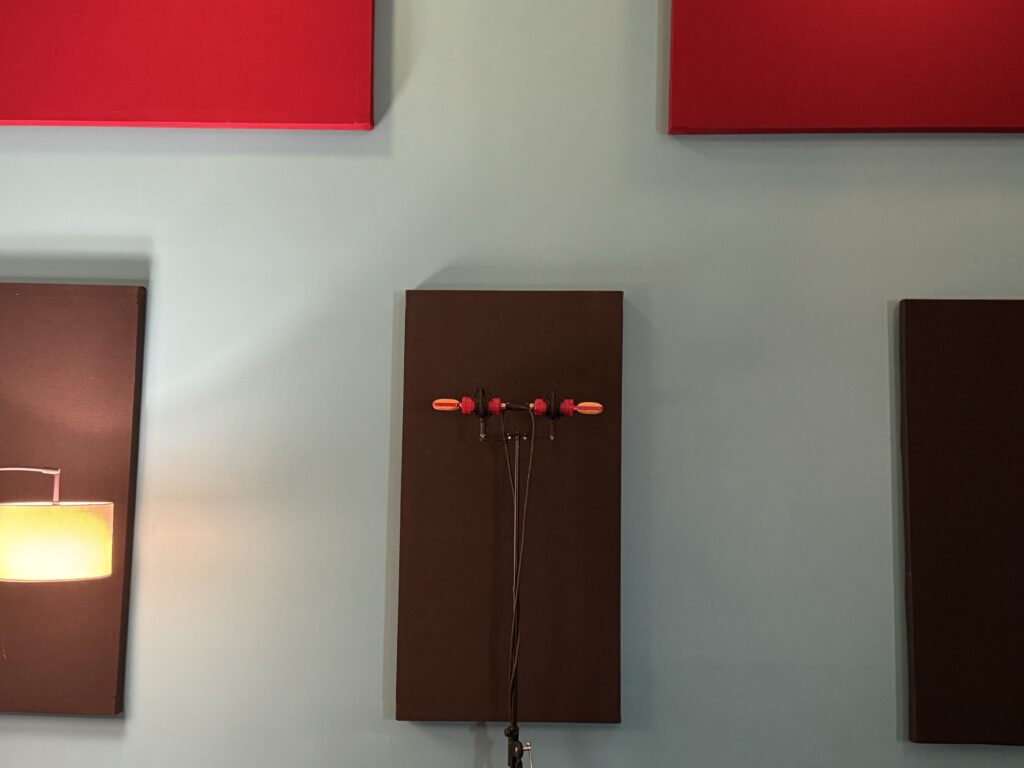
For the far room mics, I use a pair of Eikon RM8 ribbon microphones. These mics are placed about a foot apart, pointed directly upwards to capture the room’s natural sound. As these are ribbon mics with a figure-8 pattern, the null points are directed at the drums, meaning these mics don’t pick up direct sound from the drums themselves. Instead, they primarily capture the room’s reverberation, which adds depth and a sense of space to the drum recording.
These mics are positioned against a wall, but in front of a compressed fiberglass sound absorption panel to prevent unwanted reflections from the wall. Although the wall is positioned at the opposite null point of the mics, this setup ensures that the sound is clean and focused on the room’s natural acoustics without any problematic reflections.
Summary:
The combination of close and distant room mics allows me to capture a range of tonal perspectives: the close mics bring a tighter, more focused sound, while the distant mics offer a broad, ambient perspective that helps fill out the drum sound with a sense of space. The ribbon mics I use for both setups provide a warm, natural response, perfect for capturing the organic qualities of the room without introducing unwanted harshness.
Additional Microphones: The “Crotch” Mic
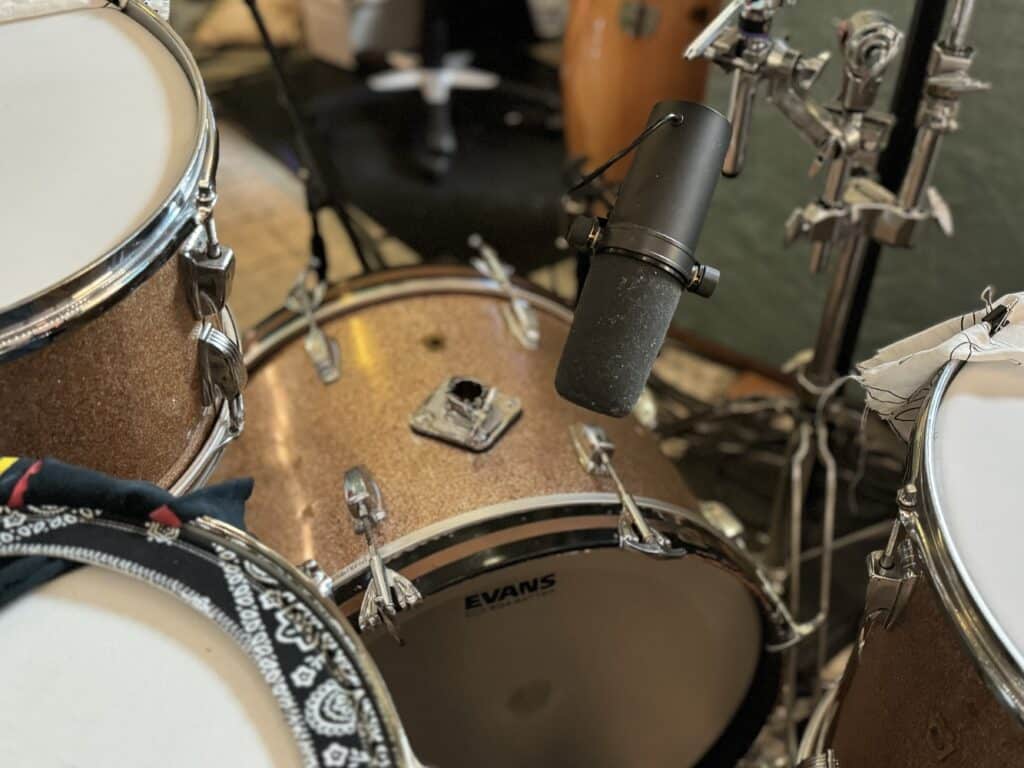
One of my favorite microphone placements in my setup is the so-called “crotch mic,” although a more polite term might be the “knee mic.” In truth, neither name fully describes the placement, but it’s a mic that provides a unique perspective on the kit. The mic is positioned equidistant from all the drums, placed above the bass drum and angled loosely toward the snare drum shell, while sitting directly between the two toms. This setup captures a broad, balanced picture of the entire drum kit, which can be incredibly useful for achieving a cohesive overall sound.
For this mic, I use a Shure SM7, a dynamic microphone known for its directional pickup pattern. This makes the mic relatively dry, as it picks up less ambient room sound, which allows the focus to remain on the direct sound of the drums. The SM7’s cardioid pattern helps isolate the kit’s core elements while minimizing bleed from surrounding instruments or room noise.
I don’t apply any processing when recording this mic; the idea is to capture the raw sound and then manipulate it later in post-production. In mixing, I typically compress the sound heavily, often with some distortion, which gives the mic a unique, aggressive character that fills out the overall drum sound. The result is a punchy, saturated tone that can add significant weight and texture to the drum mix. Sometimes, I feel like the combination of this mic, along with close mics on the kick and snare and a mono overhead, is all you need to capture a full, powerful drum sound.
Signal Chain: The Role of Preamps in Achieving A Dry Drum Sound
When it comes to signal chain, preamps are a critical component, but I often feel like discussing them could easily fill an entire article on their own. That being said, they clearly play a major role in shaping the final sound. As someone who’s largely self-taught and learned from observing experienced engineers during sessions I’ve played drums on, I’ve discovered the nuances of preamp selection and its impact on drum sounds through hands-on experimentation rather than formal training.
Initially, I assumed that achieving the “punchy” drum sound I loved came primarily from driving solid-state preamps hard enough to introduce a bit of harmonic breakup, adding some saturation and weight to the sound. However, over time, I realized that true punch in drums isn’t just about saturation—it’s primarily the result of capturing fast transients with precision. The real key is how the preamp responds to those transients, and this became clear as I started to experiment with different types of preamps.
My journey began with a Mackie Onyx board, which, despite being affordable, surprised me with its solid performance. I then upgraded to an early ’80s Yamaha console, which featured relatively accurate copies of API preamps. That change made a noticeable improvement in my sound. But the real breakthrough came when I moved into tube preamps. The moment I introduced tube pres into my setup, the difference was immediately apparent—these preamps allowed the full range of the drum sounds to breathe in a way that solid-state gear couldn’t quite replicate.
Currently, I use eight channels of D.W. Fearn preamps, which consist of four channels in a D.W. Fearn VT-24 (a model no longer in production, as they now offer only single or dual-channel units) and another four channels in Hazelrigg Industries VLCs. The VLCs are an offshoot of D.W. Fearn, with the same preamp design but with the added benefit of a Pultec-style EQ. This setup has become integral to my sound. The Hazelrigg VLCs are dedicated to the inside kick, snare top, mono overhead, and crotch mic, while I use the D.W. Fearn VT-24 and standard Fearn pres for my stereo overheads and closer room mics.
One of the most significant observations I made after incorporating the D.W. Fearn tube preamps into my signal chain was how their exceptional headroom and responsiveness allowed for fast transients to come through clearly and powerfully. This made the drums sound incredibly punchy and dynamic, as the D.W. Fearn preamps are more adept at capturing these fast, sharp hits without losing detail or clarity. To my ears, vintage solid-state preamps excel at adding crunch and saturation, but they don’t capture the same level of transient detail, often compressing them too much or lacking the speed to let them shine.
While I don’t have a technical explanation for this phenomenon (this isn’t based on any formal understanding of electronics or signal flow), it’s simply what I’ve observed from the way the preamps behave in practice. My D.W. Fearn preamps really allow the drums to “speak” in a way that feels more natural and punchy, with the transients snapping through and providing a much more immediate and impactful sound.
How to Mix Dry Drums
The fact that John provided excellent-sounding and performed drums made my job as a mixing engineer easy. In the interest of keeping this article succinct, I will have an entire separate article on techniques and plugins used to make the most out of these tracks. For anyone interested and reading this here in January of 2025, John will record drums for $99 for your first track until the end of the month, make sure to take advantage by reaching out via his website. In the meantime, here is another track, Light Up The Room, that John performed and engineered using this method:


