Oeksound’s bloom is now available, marking the Finnish company’s third major plugin release. Following up their massively successful harshness-taming Soothe2, and transient-shaping Spiff was no easy task, but oeksound was clearly up for the challenge and has delivered one of the most useful, versatile, and gorgeous-sounding tonal sculpting processors currently available. I have been fortunate to have spent the past week exploring the sonic possibilities of oeksound bloom on individual tracks, subgroups, and even when mastering, and am here to share with you my findings, while also sharing audio examples.
oeksound bloom Overview
Before we do a deep dive into this exciting processor, I wanted to express how lovely the folks at oeksound are. Having met Olli and company at NAMM multiple times, they are smart, fun to be around, and obviously care deeply about music production and audio fidelity. While it doesn’t improve the sound quality, it’s always good to know that the makers of your favorite plugins are top-notch humans. Their NAMM booths are always gorgeously designed, and they put on very informative demonstrations of their products. With that out of the way, let’s cover all things bloom.
Oeksound describes bloom as an adaptive tone shaper. Interestingly, on the product landing page they go as far as to say ‘what we wish an EQ would do’ which I think is an interesting concept. Historically, equalizers have not been able to adapt in real-time to the program material. If you boosted a few dB at 12k to bring out the airiness of a vocal, you risked that equalizer boosting at times when perhaps additive EQ isn’t necessary, and making sibilant passages sound worse. Engineers have just lived with the limitations of static tone-shaping equalizers, and great-sounding records have been made with them. As technology has advanced though, you can’t blame engineers/plugin developers for thinking deeper and pondering questions that engineers of yesteryear couldn’t even conceive of. The question that plugins like soothe2, spiff, and now bloom seek to answer is “What if we can fix frequency-dependent issues over time?”
With the controls that I am about to describe in detail, oeksound bloom selectively enhances or reduces frequencies as necessary, minimizing excess energy buildup and uncovering finer details. It facilitates swift tonal adjustments while respecting the original content. For instance, you can enhance the treble in vocals without accentuating undesirable sibilance. With bloom, you can achieve brightness without introducing harshness, and add low-end warmth without creating ‘mud’.
oeksound bloom GUI and Controls
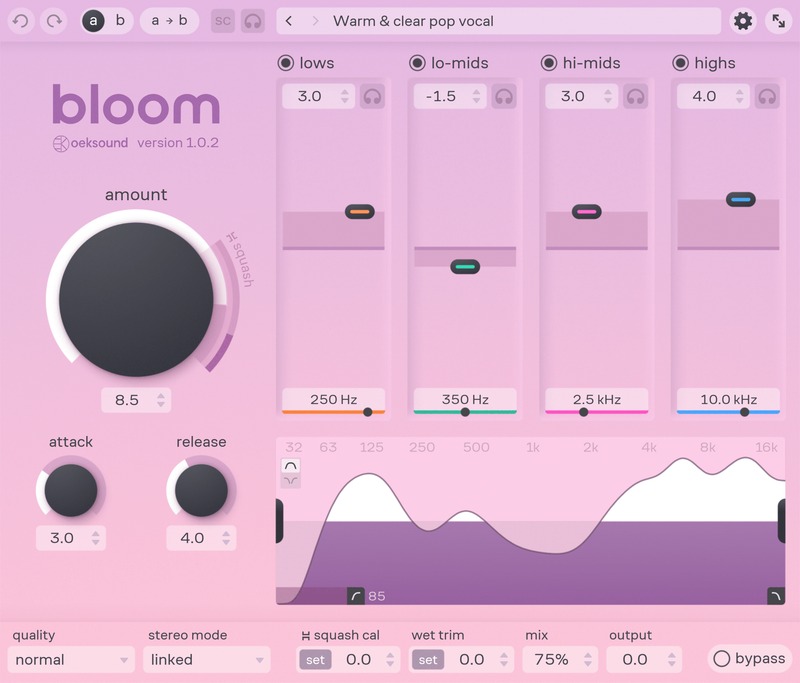
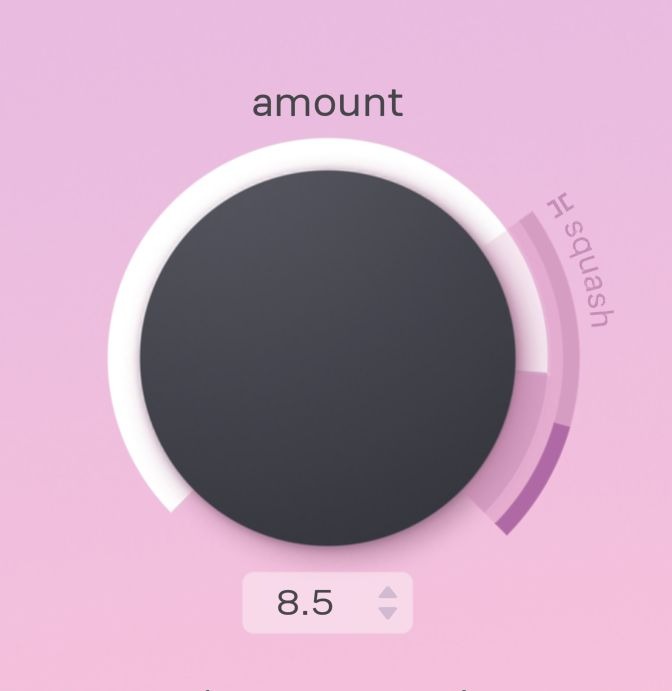
As with all oeksound plugins, the GUI is a stunner– bloom is easy on the eyes, laid out in a sensible manner, and can be navigated quickly to achieve impressive sonic results. Bloom contains a variety of sections, each with their own controls that can be dialed in to achieve the desired sound. The main section is home to the all-important Amount knob which regulates the overall processing applied to the signal, with higher values boosting and attenuating the audio more adaptively. The lower range (0-3) offers fine control for subtle adjustments, while levels 0-7 maintain level independence. Values from 7-10 activate a Squash range, where processing becomes increasingly level-dependent. In this range, frequency-dependent compression is applied, visible on the squash meter as purple.
The squash threshold adjusts according to the equal-loudness contour, resulting in harder knee and higher thresholds in less sensitive frequency ranges, and softer knee and lower thresholds in more sensitive areas, thereby concentrating compression where the ear is most sensitive. It’s important to note that when not squashing, bloom’s processing remains level-independent, ensuring the preservation of the signal’s original shape and dynamics, particularly advantageous for vocals or voice-overs. Introducing squashing, however, allows for dramatic tonal shaping, pushing the signal forward, and fostering creative applications. Squashing can also be employed for parallel processing within a mix, such as on drum channels.
The Main Section is also home to attack and release controls, which allow the user to tweak how quickly bloom reacts to program material. The default settings are a great starting point for most applications, but experimentation is encouraged if you need a different response from the plugin.
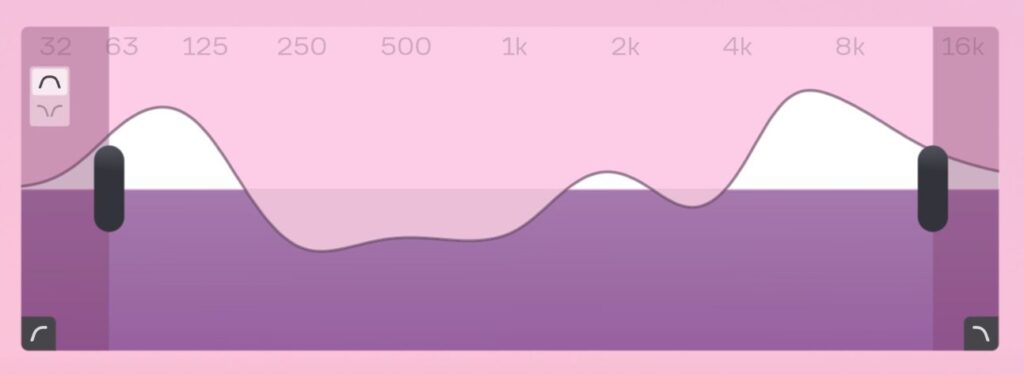
The next section is the Processing Graph, which provides essential visual feedback pertaining to how bloom is handling signals. Look at the diagram beneath and be mindful of the following:
The purple area represents the parts of the signal present in both unprocessed and processed signals.
The gray area under the middle line represents cuts.
The white area above the middle line represents boosts.
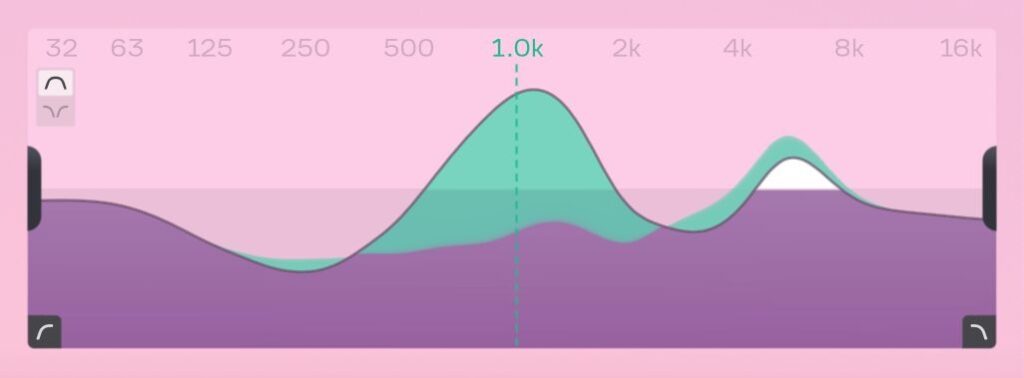
When the Tone Controls are in use (more on these shortly), the user is provided visual feedback about what each control is doing:
The colored areas over the black line are the parts of the signal that are cut by the band.
The colored areas under the black line are the parts that are boosted by the band.
For control of the extremities of the frequency spectrum, bloom allows users to prevent the highs and lows from being processed by dragging handles. In exclude mode, users can prevent the midrange from being affected. Lastly, low and high-cut filters affect the overall output signal.
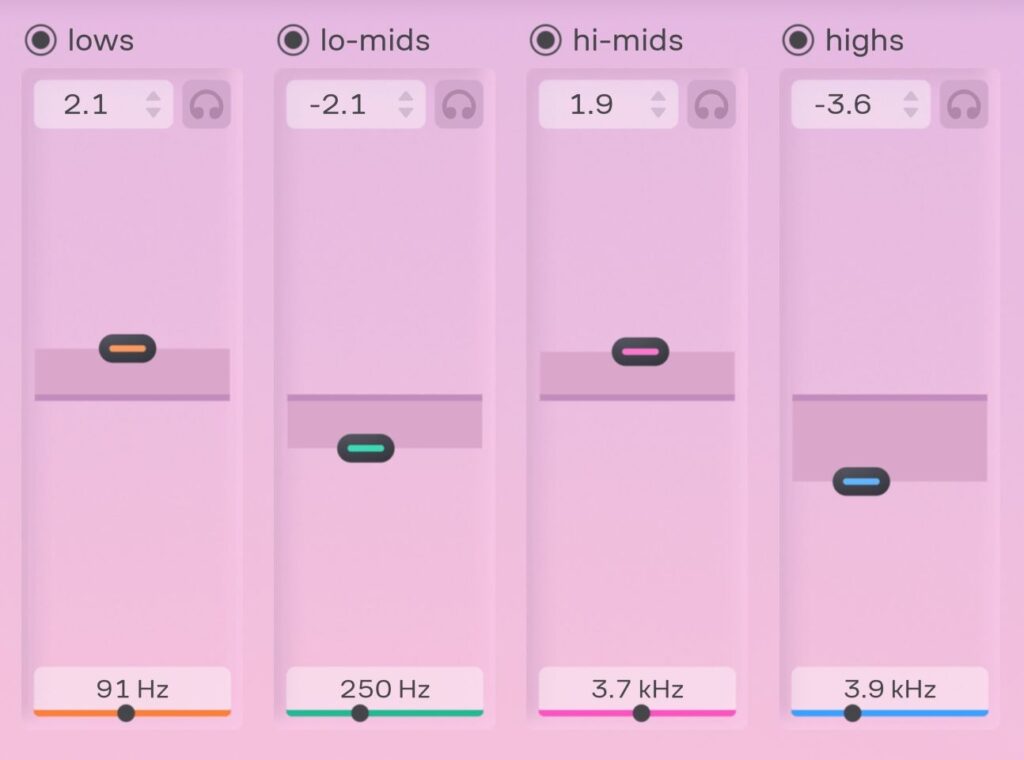
The Tone Controls are where bloom starts to go really deep, allowing users for much more control over the timbre of signals. This section regulates the emphasis of specific frequency ranges. Shifting the tone control handle upwards or downwards alters the intensity within the band, thus reshaping the overall tone. Highlighting a particular range (such as lows or low-mids) directs processing to amplify that frequency area, while the opposite reduces emphasis. It can also be viewed as a calibration for processing adjustments, allowing one to tailor bloom’s corrections to your preference.
In short, boosting a tone control region results in amplified frequencies within that range, whereas cutting diminishes them.
Modify the central frequency of the tone area band by adjusting the handle left or right. While the center frequency isn’t precise, it acts as a reference point since all tone control regions affect the entire frequency spectrum.
In practice, these controls are what really set oeksound bloom apart from other adaptive tone shapers currently available. I found it quite difficult to make source material sound bad, even with drastic boosting of the tone controls. With the maximum amount of boosting using the highs tone control, vocals never sounded harsh or brittle. Impressive, really.
On the other end of the spectrum, excessive reduction can lead to tracks sounding thin and lifeless, but attenuation using bloom is undeniably useful for tracks with excessive buildup in any given range.
Additional sections worth mentioning include:
Quality with options including “normal”, “high”, and “low latency”.
A Stereo section that allows users to control how the two channels are processed, with modes including traditional Left/Right and M/S (Mid -Side). It’s worth mentioning that the individual tone control values can be adjusted separately in the L/R and M/S split modes. Drag the individual tone control handles (L/R or M/S) to adjust their values for each stereo channel. This way, you can for example emphasize the highs on the side channels while de-emphasizing them in the mid-channel.
The output and calibration section contains controls for squash sensitivity calibration and different aspects of what happens to the signal after the processing. The ever-useful wet control allows the user to blend the original and processed signal, which is quite handy when applying bloom in an extreme manner.
Applications for oeksound bloom
Take one quick look at the presets that come packaged with bloom, and you’ll see that oeksound designed this plugin to work in a wide variety of ways. From individual instruments to busses, and even on the mix bus and during mastering, bloom excels at many applications. It makes sense because it was designed to be quite clean and subtle—I’d venture to say that if you don’t have high-quality monitoring, you’re going to miss out on a lot of what bloom has to offer. So far, I’ve found it to be most useful at making material ever so slightly better— tracks can have a bit more clarity, warmth, bite, detail, etc. without the negative qualities that would be brought on with a traditional static equalizer.
That said, squash mode is quite interesting, as it doesn’t behave or sound like a traditional dynamics processor. It can be used to make a drum bus sound more explosive, a bass sound thick and powerful, a vocal seem more aggressive and bright, or even on a mix bus to add some creative pumping artifacts.
One detail worth considering is where in the chain bloom belongs. On one hand, you could place it first and rely on the processor to refine and bring out the best in the material before adding anything else. Conversely, you can place bloom at the end of the chain for a nice sheen that corrects any unwanted details brought on by prior processing. Pop bloom in the middle of the chain, or use 10 instances of it on each of your 100 tracks and build a fire from your smoldering CPU. I don’t know, you do you! Joking aside, bloom is a processing-intensive plugin, but I’ve had no issues running a handful of instances of it in a relatively large session.
Have a listen to oeksound bloom on a variety of sources and hear for yourself:
Note: In this example on stacked vocals, Version A is with no effect, Version B is with a moderate amount of bloom added, and Version C is with bloom squashing the signal.
If you like what you hear, participate in this month’s remix contest and take a shot at your own version of “Move It” by SIGNALS
Note: In this example on drum buss, Version A is with no effect, Version B is with a moderate amount of bloom added, and Version C is with bloom squashing the signal.
Note: In this example on piano, Version A is with no effect, Version B is with a moderate amount of bloom added, and Version C is with bloom squashing the signal.
oeksound bloom summary
I’m excited to spend more time with oeksound bloom, as with its older siblings soothe2 and spiff, it’s quite feature-laden, and seeks to do something that not many other plugins do. Both of the other oeksound offerings are all over my sessions now, and I can say with confidence that bloom will find a home inserted on plenty of tracks while producing, mixing, and mastering music. I should say bloom is a subtle tonal sculpting processor, it absolutely will improve the sound of your individual tracks and therefore mixes, but if you’re expecting to pop it on tracks and have them sound entirely different, you might be let down, especially if you’re not using high-quality monitoring. For indie producers who don’t have access to pristine rooms, vintage mics, and colorful preamplifiers, bloom will help ‘raise the floor’ of your audio quality, and for seasoned professionals who are already working with fantastic recordings, bloom can serve as that last 5% to get productions across the finish line. Kudos to oeksound for delivering another winner, the hard work that went into bloom is undeniable.

